
If you want to know how to scan negatives properly, one of the most important things to understand is that scanning and editing are two different stages.
The purpose of the scan is not necessarily to create the finished photograph. It is to capture as much useful information from the negative as possible, without clipping important detail or introducing unnecessary processing.
Whether you are using a dedicated film scanner, a flatbed scanner or photographing your negatives with a digital camera, a good scan gives you a much better starting point for everything that follows.
In this guide, we’ll look at how to scan film negatives, how to prepare them, which settings matter, what file format to use and some of the common mistakes that can reduce the quality of your scans.
How to Scan Negatives Step by Step
Although different scanners and camera scanning systems work in slightly different ways, the basic process is straightforward.
1. Clean the Negative
Before scanning, carefully remove dust from the negative using an air blower or a suitable anti static brush.
Avoid touching the film surface with your fingers. Dust, fingerprints and marks become surprisingly obvious once a negative has been scanned and converted into a positive image.
Taking a little extra time at this stage can save a considerable amount of retouching later.
2. Keep the Film Flat
Place the negative into your scanner or film holder and make sure it is held as flat as possible.
Film flatness matters because a curved negative may cause parts of the image to fall outside the scanner or camera’s plane of focus.
This is particularly important with high resolution scans and camera scanning, where even relatively small differences in film position can affect sharpness.
3. Choose the Correct Scan Settings
For high quality negative scanning, the aim is to preserve as much useful information as possible.
Where your scanner and software allow it, I recommend:
- Using a high bit depth
- Saving your master scan as TIFF
- Avoiding unnecessary sharpening
- Disabling automatic contrast adjustments
- Avoiding automatic corrections that permanently alter the scan
- Making sure important highlight and shadow information is not clipped
If you intend to perform the negative conversion separately, scanning the negative as a positive image can also give you greater control over the process.
4. Check the Tonal Range
Before making the final scan, check that you are capturing the useful tonal range contained in the negative.
You don’t want important information pushed beyond the limits of the scan.
This becomes particularly important with dense negatives, where valuable information can exist in areas that may initially appear difficult to capture.
5. Make the Scan
Once your settings are correct, make the scan at an appropriate resolution for your negative and scanner.
Higher numbers do not automatically mean better results.
There comes a point where increasing the scanning resolution simply produces a larger file without capturing any additional useful detail from either the film or the scanner.
6. Save a High Quality Master File
I recommend saving important scans as high bit depth TIFF files.
Think of this as your digital master.
You can then use that master file for conversion and editing while retaining the original scan for future use.
7. Convert the Negative
Once the scan has been captured successfully, the negative can be converted into a positive image.
This is where the photograph begins to take shape.
Contrast, tonal relationships and the final appearance of the image can then be controlled during conversion and subsequent editing rather than being permanently determined by the scanner.
What Is Negative Scanning Actually Trying to Achieve?
It’s easy to think that the purpose of scanning is to make the image look good immediately.
That isn’t necessarily the best approach.
When scanning film negatives for later conversion, I prefer to think of the scanning stage as data capture.
The aim is to capture the useful information contained in the negative and preserve it in a digital file.
Creative decisions can then be made afterwards.
This separation between capture and interpretation is important because adjustments made by scanner software can sometimes be difficult or impossible to reverse later.
If information is clipped during scanning, no amount of editing can genuinely recover information that was never captured.
Preparing Film Negatives for Scanning
A good negative scan starts before you press the scan button.
Dust is probably the most obvious problem.
Use an air blower or appropriate anti static brush to remove loose particles before placing the negative in the holder.
Try to avoid compressed air products that may leave residue on the film.
Handle negatives by their edges whenever possible.
Film flatness is equally important.
A negative that bows or curves may not remain within the scanner’s optimum focus area. With camera scanning, maintaining flatness becomes even more critical because you are photographing a flat object with a lens at relatively close range.
Good preparation might only take a minute, but it can make a noticeable difference to the final result.
What Resolution Should You Use to Scan Negatives?
Resolution is one of the most confusing areas of film scanning.
Scanner manufacturers often advertise very high DPI figures, but the quoted resolution isn’t necessarily the same as the amount of genuine image detail the scanner can resolve.
For example, scanning at an extremely high resolution may create a much larger file without actually recording any additional useful detail.
The appropriate resolution depends on several things:
- The size of the negative
- The resolving ability of the scanner
- The film stock
- The quality of the original photograph
- How large you intend to print the finished image
With 35mm film in particular, sufficient resolution is important because you are enlarging a relatively small original.
However, there is little benefit in generating enormous files once you have exceeded the useful resolving capability of your scanner and negative.
The aim isn’t to create the biggest scan.
It’s to capture the useful detail contained in the film.
Scanning 35mm Negatives
35mm is probably the film format most people have in mind when they ask how to scan negatives.
Because the original frame is relatively small, good focus, film flatness and scanner resolution are particularly important.
A dedicated film scanner can work extremely well for 35mm negatives because it is designed specifically for small film formats.
Flatbed scanners can also be used, although their effective resolution and film holding systems vary considerably.
Camera scanning has become another popular option, particularly with modern high resolution digital cameras and good macro lenses.
Whichever method you use, the fundamental objective remains the same:
Capture as much useful information from the negative as your equipment allows.
Should You Scan Negatives as Positive or Negative?
This depends partly on the workflow you intend to use.
Many scanner applications can scan a negative and automatically convert it into a positive image.
That’s convenient, but it also means the scanning software is making decisions about how the negative should be interpreted.
If you want greater control over the conversion, another approach is to scan the negative as a positive image and perform the inversion afterwards.
The initial file will still look like a negative.
That’s perfectly normal.
At this stage, you are interested in capturing the negative accurately rather than creating the finished photograph.
The conversion can then be performed separately using the software and workflow of your choice.
Should You Scan Negatives as TIFF or JPEG?
For important master scans, I strongly favour TIFF.
JPEG is an extremely useful format for finished photographs because it creates relatively small files that are easy to display, upload and share.
But JPEG achieves those smaller files using lossy compression.
For a master negative scan that you intend to process and edit, preserving as much information as possible is generally preferable.
A high bit depth TIFF gives you considerably more flexibility.
My preferred approach is simple:
Scan to TIFF. Convert and edit from the TIFF. Create JPEGs afterwards when you need them.
Storage is relatively inexpensive compared with the time involved in rescanning an entire film archive.
8 Bit or 16 Bit for Negative Scanning?
Where your scanner and workflow support it, I recommend working at a higher bit depth for your master scans.
Higher bit depth allows the file to represent a greater number of tonal values.
This can be particularly useful when making substantial tonal adjustments after scanning.
It doesn’t mean that a 16 bit file automatically looks better than an 8 bit file.
The advantage is the additional editing latitude available while you are working on the image.
Once the photograph is finished, you can create whatever output format is appropriate for its final use.
What Is a Linear Scan?
This is where negative scanning becomes particularly interesting.
Most images we normally view on a computer aren’t stored or displayed as truly linear data. Gamma correction and tone curves are commonly applied to make images suitable for normal viewing and editing.
A true linear scan uses gamma 1.
In simple terms, this means the tonal information captured by the scanner has not had the normal gamma correction applied to it.
The result won’t necessarily look attractive when first opened.
And it isn’t supposed to.
A linear scan is intended to provide a neutral starting point for subsequent conversion.
For photographers who want greater control over the interpretation of their negatives, particularly black and white negatives, this can be extremely useful.
Why Gamma 1 Matters
A gamma 1 scan preserves a direct linear relationship in the captured tonal data rather than applying the conventional gamma correction normally used to produce a visually pleasing image.
This matters because once a tone curve or other processing has been applied during scanning, the data being passed to the conversion stage has already been altered.
With a linear workflow, the idea is to postpone those decisions.
The scan captures the information.
The conversion interprets it.
The editing creates the final photograph.
Keeping those stages separate provides much greater control over the process.
Linear Scan vs Normal Scan
A normal scan is often designed to give you something that looks reasonably good immediately.
Scanner software may apply gamma correction, contrast adjustments, sharpening and other processing.
For many users, that’s exactly what they want.
A linear scan has a different purpose.
It is designed to preserve a more neutral representation of the captured data so that the tonal interpretation can be performed afterwards.
Neither approach means that the scanner itself somehow captures more physical information simply because the file is linear.
The difference is in how that captured information is encoded and processed before you receive the file.
For a controlled negative conversion workflow, that distinction is important.
Avoid Clipping When Scanning Negatives
One of the most important things to watch when scanning film is clipping.
If part of the negative falls outside the tonal range captured in the digital file, that information may be lost.
This is particularly important when dealing with dense areas of a negative.
Remember that a photographic negative is reversed.
Areas of greater negative density correspond to brighter areas in the final positive image.
So if dense areas of the negative are clipped during capture or processing, you may lose information that would otherwise have appeared in the highlights of the finished photograph.
A histogram can be extremely useful here.
The goal isn’t necessarily to stretch the histogram so that it fills the entire available range.
The goal is to make sure the useful information from the negative is captured without clipping it.
Scanner Software and Automatic Adjustments
Scanner software often includes a long list of automatic features.
These can include:
- Auto exposure
- Automatic contrast
- Sharpening
- Grain reduction
- Noise reduction
- Colour correction
- Dust removal
- Automatic negative conversion
Some of these tools can be useful.
But if your intention is to create a high quality master scan for later processing, it’s worth considering whether you actually want those adjustments permanently applied during capture.
Personally, I prefer to keep the scanning stage as neutral as practical and make creative adjustments afterwards.
That way, I retain control over what is happening to the image.
Dedicated Film Scanner vs Flatbed Scanner
Dedicated film scanners and flatbed scanners each have advantages.
A dedicated film scanner is specifically designed to scan transparent film and can offer very good resolution and focus, particularly with 35mm negatives.
A flatbed scanner capable of transparency scanning can be extremely convenient, especially if you work with several film formats.
Some flatbeds allow multiple negatives to be scanned simultaneously, which can make digitising a large archive much quicker.
The trade off is that the effective resolution may not match that of a good dedicated film scanner.
Film holders and film flatness can also affect results.
As always, the specification sheet doesn’t tell the whole story.
The quality of the actual scan is what matters.
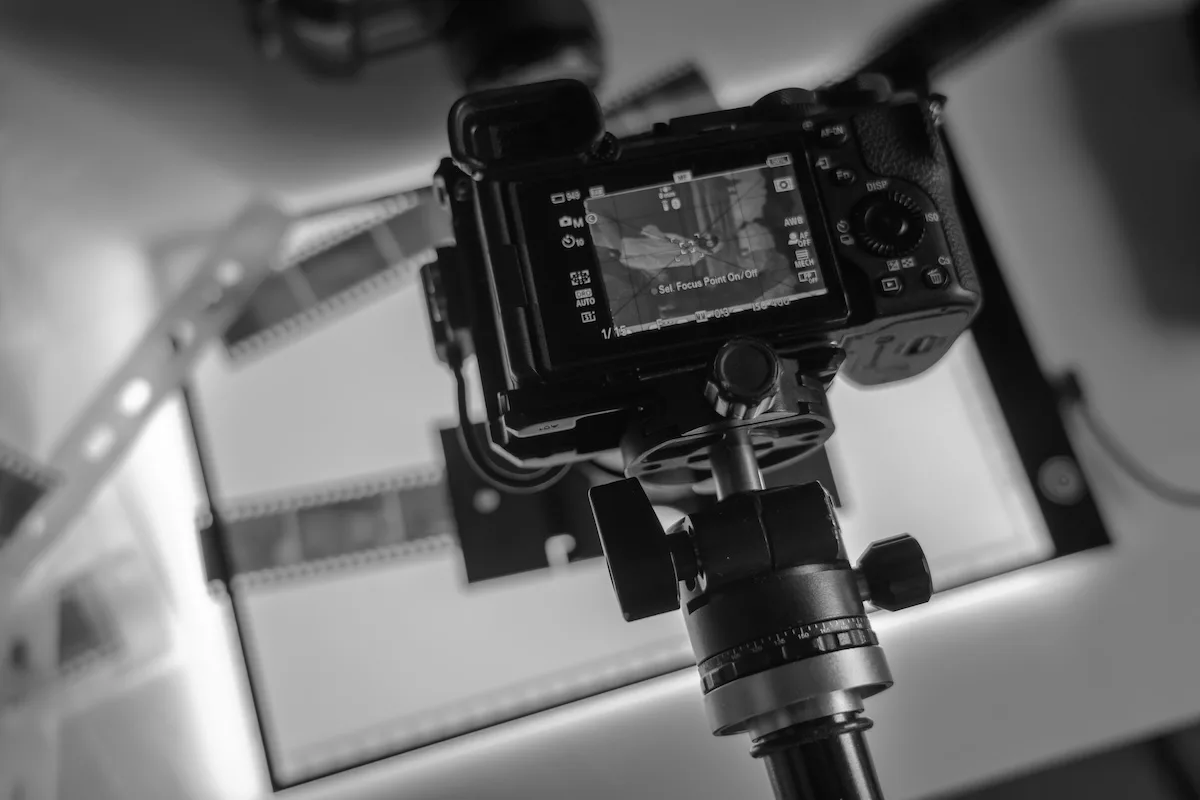
Camera Scanning Film Negatives
Camera scanning has become increasingly popular.
Instead of using a conventional scanner, you photograph the negative using a digital camera, usually with a macro lens and a suitable backlight.
A typical setup includes:
- A digital camera
- A good quality macro lens
- A rigid copy stand
- A film holder
- A suitable high quality light source
Camera scanning can be extremely fast and capable of producing excellent results.
However, alignment is critical.
The camera sensor and negative should be parallel. The film needs to remain flat and the illumination needs to be even across the entire frame.
The quality of the light source also matters.
A poor light source can introduce unevenness or other problems that become much more obvious after conversion.
Is Camera Scanning Better Than a Film Scanner?
There isn’t a universal answer.
A good camera scanning setup can produce superb results and is extremely fast once everything is correctly aligned.
A good dedicated film scanner can also produce excellent results with less physical setup.
The better choice depends on your equipment, the amount of film you’re scanning and the workflow you prefer.
What matters more than the method is the quality of the capture.
A badly aligned camera scanning setup isn’t automatically superior to a scanner simply because the camera has a high megapixel count.
Likewise, an expensive scanner won’t compensate for poor scanning technique.
Scanning Black and White Negatives
Black and white negative scanning is conceptually straightforward because there is no colour balance or orange mask to deal with.
But tonal control becomes particularly important.
A black and white negative can contain a very wide range of densities, and the way those densities are translated into the final positive photograph has an enormous effect on the character of the image.
This is one reason I favour separating the scanning stage from the conversion stage.
Capture the information contained in the negative first.
Then decide how you want that information to appear in the finished photograph.
For photographers accustomed to traditional darkroom printing, the idea is quite familiar.
The negative is the source.
The final print is an interpretation of that source.
Digital negative conversion simply gives us another way of making that interpretation.
Converting a Negative to a Positive
Once you’ve produced a good scan, you need to convert the negative into a positive image.
At its most basic level, this involves inverting the tonal values.
But simply pressing Invert doesn’t necessarily produce a finished photograph.
After inversion, you’ll normally want to establish appropriate black and white points, adjust contrast and shape the tonal relationships within the image.
This is where the quality of the original scan becomes important.
A scan containing good tonal information gives you considerably more freedom when making those decisions.
A scan that has already clipped important information or had aggressive processing applied to it gives you less room to work.
A Good Workflow for Scanning Film Negatives
If you’re building a film scanning workflow, I recommend keeping it simple and repeatable.
Stage 1: Prepare
Clean the negative and make sure it is flat.
Stage 2: Capture
Scan or photograph the negative while preserving the useful tonal information.
Stage 3: Save
Keep a high quality master file, preferably a high bit depth TIFF.
Stage 4: Convert
Convert the negative into a positive image.
Stage 5: Edit
Make the creative tonal adjustments needed to produce the photograph you want.
Stage 6: Output
Create JPEGs, print files or other versions appropriate for their intended use.
The important principle is that you don’t need to make every decision during the scanning stage.
Common Negative Scanning Mistakes
A few simple mistakes can significantly reduce scan quality.
Clipping the Tonal Range
Make sure important information isn’t being cut off at either end of the captured range.
Too Much Automatic Processing
Scanner software can make an image look more impressive immediately, but automatic contrast, sharpening and other adjustments may not be what you want in a master scan.
Scanning Only to JPEG
JPEG is fine for finished images but isn’t my first choice for an archival master scan.
Poor Film Flatness
Curved film can reduce sharpness and make consistent focus difficult.
Dusty Negatives
Removing dust before scanning is considerably easier than retouching hundreds of spots afterwards.
Excessive Resolution
More DPI doesn’t automatically mean more genuine detail.
Understand the useful resolving capability of your equipment rather than simply selecting the largest number available.
Sharpening Too Early
Sharpening is generally better applied deliberately later in the workflow rather than permanently during scanning.
How to Get Better Film Scans
If you want better results from negative scanning, concentrate on the fundamentals:
Keep the film clean.
Keep the film flat.
Capture all the useful tonal information.
Avoid clipping.
Avoid unnecessary processing during capture.
Use an appropriate resolution.
Keep a high quality master file.
Make the creative decisions during conversion and editing.
You don’t need the most expensive scanner available to improve your results.
Understanding what the scanner is doing to your negative is often more important than buying new equipment.
Final Thoughts
Learning how to scan negatives properly is really about understanding the difference between capturing a negative and interpreting it.
The scanner’s job is to give you a high quality digital representation of the information contained in the film.
It doesn’t have to create the finished photograph.
By keeping the negative clean and flat, using appropriate settings, avoiding clipping, preserving a high quality master file and controlling the conversion separately, you give yourself much greater freedom when creating the final image.
And if you want maximum control over the conversion process, a true gamma 1 linear scan provides a particularly useful starting point because the normal gamma correction hasn’t already been applied to the captured tonal data.
The better your starting scan, the more control you have over everything that follows.